Hi lovelies! I’m so excited to get to share with you photos and tutorials from my branding expert (and the brilliant designer behind both OriginalFlavor GirlyPC.com and our new look) Jessica Albon’s home office project. She wanted a new look for her room that was cozy and colorful, but not overwhelming and that made great use of her large office space. So, together, she and I mapped out a plan, and she agreed to walk you through exactly what she did to make the office look great and function even better. Today, she’s going to introduce you to her office and tell you a bit about the before. In future posts, she’ll tell you about the projects she tackled.
My home office was originally the home’s garage–they converted it to a den in the mid-70s so I started with the requisite brown paneling and very creepy, dark closet space. On the one hand, one full wall of the office (a full 20′ span) was closets which seemed great for storage. But, on the other, the closets were 4′ deep (so deep as to be unproductive), and made the office’s one window look dramatically off center, plus they meant I couldn’t put any furniture along one full wall. Added to all that, they were really dark and creepy and would have been a nightmare to paint. (The ceilings in my office are 13′ high, and the closets went all the way up, paneled both inside and out.)
So, my first step was to pull out the closets and pull down the paneling. Even with lots of help, these two tasks took about two weeks. Then, the whole office was painted a cream color–ceiling and walls. I really like that the color is light and airy, but warmer than white. On the downside, I chose a matte because the walls are in rough condition (which was probably why the original owners had added the paneling!) and so the effect is a bit darker than I’d hoped.
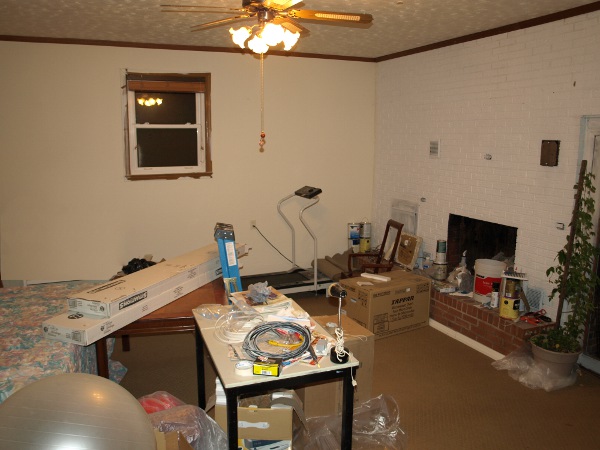
Here’s what the office looked like once the painting was done. (Yowzas–that is one gigantic mess!)

You can see the new carpet in the photo, too, but what you can’t see is that I left the original (filthy) Berber carpet on the stairs… When the room was a garage, it had concrete stairs going out of the garage and into the house. When they installed the Berber carpet, they glued it down to the stairs. After having tackled lots of other projects in the house, I was convinced the carpet was going to be a nightmare to get off the stairs (whenever possible, the original homeowners used the strongest glue they could find–which was great for longevity, but made removal… not so great). So, I left it. For about six months.
Then, Jessica Zee came for a client meeting about her website. Other than the eyesore stairs, my office was in “pretty good” shape. But, she knew it could be better. So, she challenged me to shape things up and make the office reflect my style as a designer.
She suggested I start with those horrible stairs, and as soon as she left, I decided to see how hard it would be to take off. And I started pulling. And yanking. And a day later, the carpet was completely off the stairs. (My hands were also covered in blisters. It’s such a good thing I’m not a regular mani-pedi girl.)
Alas, under the carpet, the concrete stairs were in worse shape than I’d anticipated. They’re *really* uneven (to the point where part of a step is missing–I always wondered why I slipped if I stepped on that stair wrong, and now I know–there was no concrete under the carpet in that spot, just air!). Also, prior to the Berber carpet, the stairs had been covered first in glued-down carpet and then in glued-down carpet padding. I got up as much of it as I could, but eventually was doing more harm than good and so I figured I’d let the paint hide the rest of the flaws.
Of course, little did I know that painting concrete stairs was going to require TEN coats of various products. (Which meant nearly 20 days that the stairs couldn’t be walked on.) But that’s a story for part two of this home office makeover.

6 Comments
So excited about this series! Would love to see more just like it in the future.
Your den sounds exactly like ours, right down to the glued down padding. What were they thinking?! I had my heart set on hardwoods, but it would have been such an ordeal to scrape the floors, repair the floors, and then finally get them ready to install hardwoods on top of them… Plus, our den is even bigger than yours, and I kind of couldn’t stomach the idea of paying $5000+ just for the flooring in there. So, I’m really looking forward to seeing how you tackled this project!
Who doesn’t love a makeover! (In photos, at least… It’s so much easier living vicariously.)
Wow–your office looks a lot like mine, complete with exercise ball! Can’t wait to see the after.
I love makeovers! Can’t wait to see the finished office. Since I know both of your work, I bet it’ll be really great, and probably really practical, too.
Delighted y’all are as excited as I am to have this makeover series. I’ve been really impressed at how hard Jessica’s working and think you’ll really enjoy the final reveal.
Comments are closed.